

Setup WHM/cPanel Exim to Send Emails Per-domain Using SMTP Smarthost
If your server sending emails using cPanel/WHM (Exim Manager) with regular phpmail or Sendmail functions on your websites, you may notice that some of the outgoing emails may end up in the spam/junk folder instead of arriving at the primary inbox. Especially if you running an e-commerce website this will be the worst thing and it means losing a lot of money and potential customers.
In this tutorial, I will show you how to solve spam email issues and use custom transactional emails or bulk email services such as Mandrill, Sendgrid, Mailgun, or any other custom or multiple SMTP.
Exim is a message transfer agent (MTA) developed at the University of Cambridge for use on Unix systems connected to the Internet. It is freely available under the terms of the GNU General Public Licence.
First Step, Backup the Exim configuration
Login to WHM, go to the “Exim Configuration Manager”, (Home > Service Configuration > Exim Configuration Manager), then click on “Backup” tab, You can save a backup file of the currently Exim installed configuration:
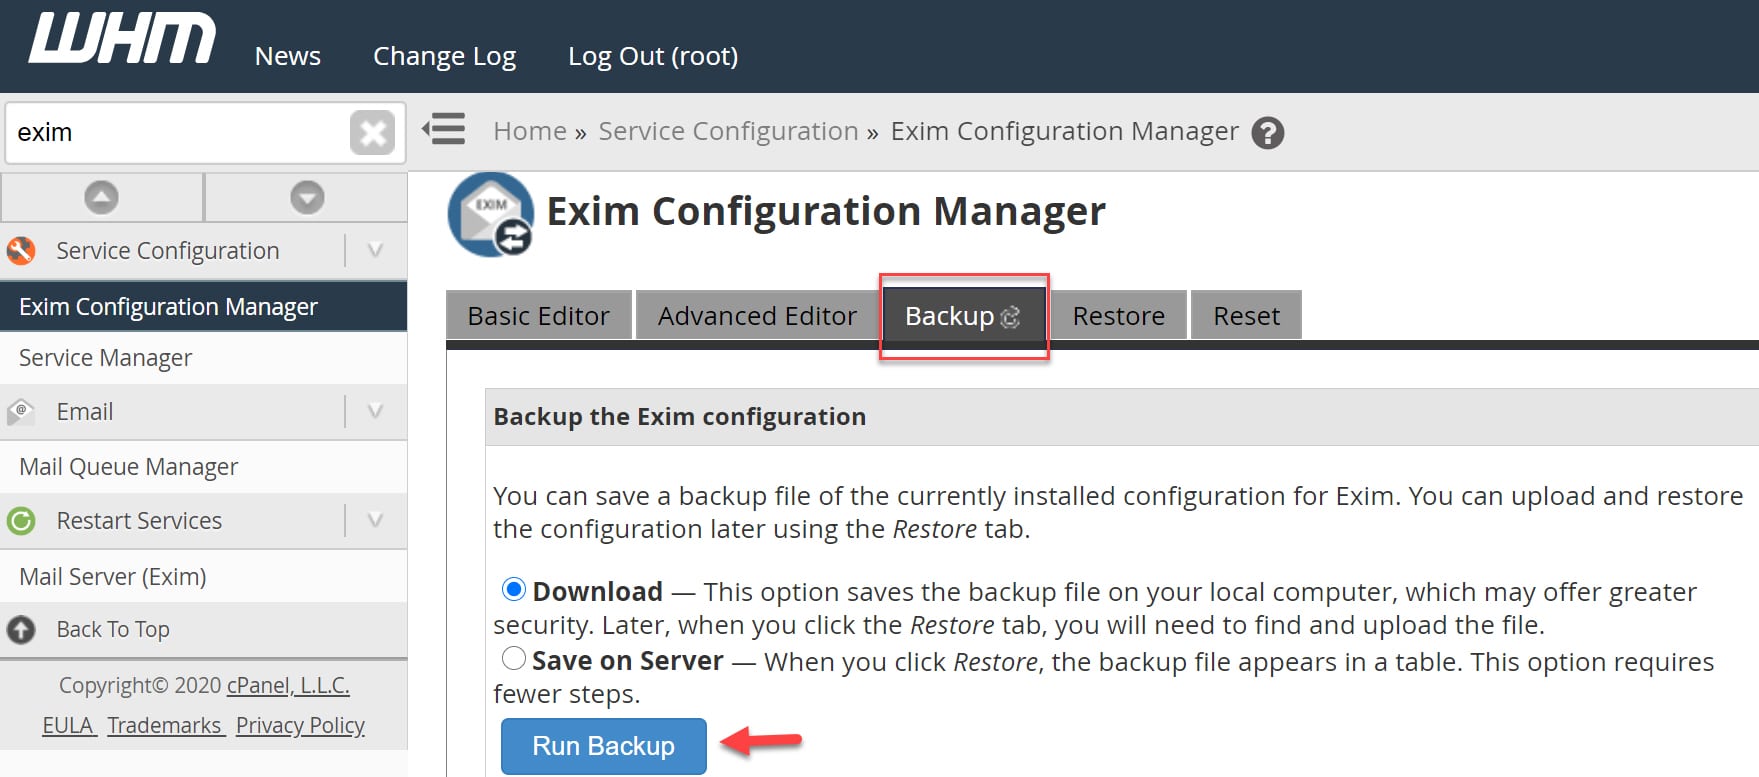
You have two options Download the backup file to your computer or save it on your server, and both options you can upload and restore the Exim configuration later using the Restore tab.
Second Step: Exim advanced editor configuration
Login to WHM, go to the “Exim Configuration Manager”, (Home > Service Configuration > Exim Configuration Manager), then click on “Advanced Editor” tab.
Scroll down to an editable field called “Section: AUTH“. you can use the browser search to locate it fast, just copy this text “Section: AUTH” without double-quotes of course.
Then, copy the code below into the “Section: AUTH” field just like the next image below, any line starting with # is just a comment you can remove or change it as you like, don’t change anything in rest of the code to avoid issues.
#Send by Smart Hosts
sendbysmarthosts:
driver = plaintext
public_name = LOGIN
hide client_send = : ${extract{user}{${lookup{$sender_address_domain}lsearch{/etc/exim_smarthosts_config}}}}: ${extract{pass}{${lookup{$sender_address_domain}lsearch{/etc/exim_smarthosts_config}}}}
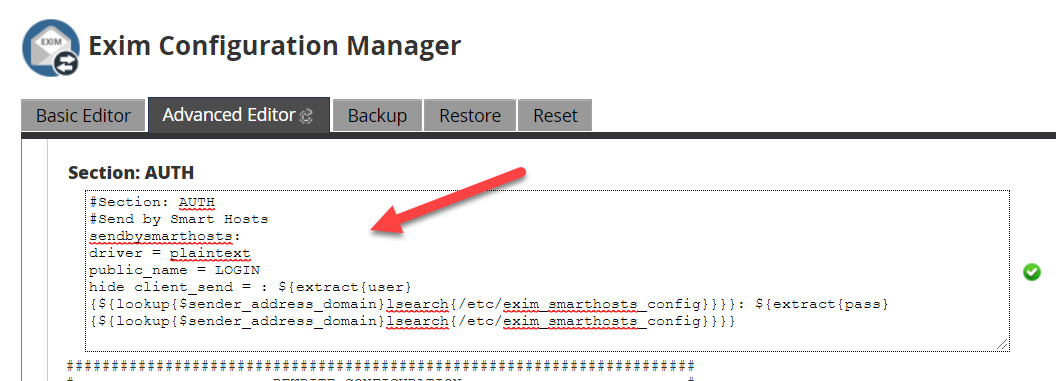
After copying that code into Section:AUTH, you will notice the green verified sign as a validation for the code is OK for Exim, check image above to see the green sign.
Next step, Scroll down to an editable field called “Section: PREROUTERS“. Also, you can use the browser search as told you before in the previous step
and paste the following code into “Section: PREROUTERS“:
#Send by Smart Hosts
sendbysmarthostsrouter:
driver = manualroute
domains = ! +local_domains
condition = "${if eq{${lookup{$sender_address_domain}partial-lsearch{/etc/exim_smarthosts_config}{$value}}}{}{false}{true}}"
ignore_target_hosts = 0.0.0.0 : 127.0.0.0/8
headers_add = "${perl{mailtrapheaders}}"
transport = sendbysmarthoststransport
route_list = * ${extract{smtp}{${lookup{$sender_address_domain}lsearch{/etc/exim_smarthosts_config}}}}
For “ignore_target_hosts” line: This option may also be useful for ignoring local IP addresses and Most probably, you will not have to add extra IPs On my server, it was not necessary.
Finally, the last Exim configuration, find “Section: TRANSPORTSTART”, copy and paste the next code:
#Send by Smart Hosts
sendbysmarthoststransport:
driver = smtp
port = ${extract{port}{${lookup{$sender_address_domain}lsearch{/etc/exim_smarthosts_config}}}}
hosts_require_auth = $host_address
hosts_require_tls = $host_address
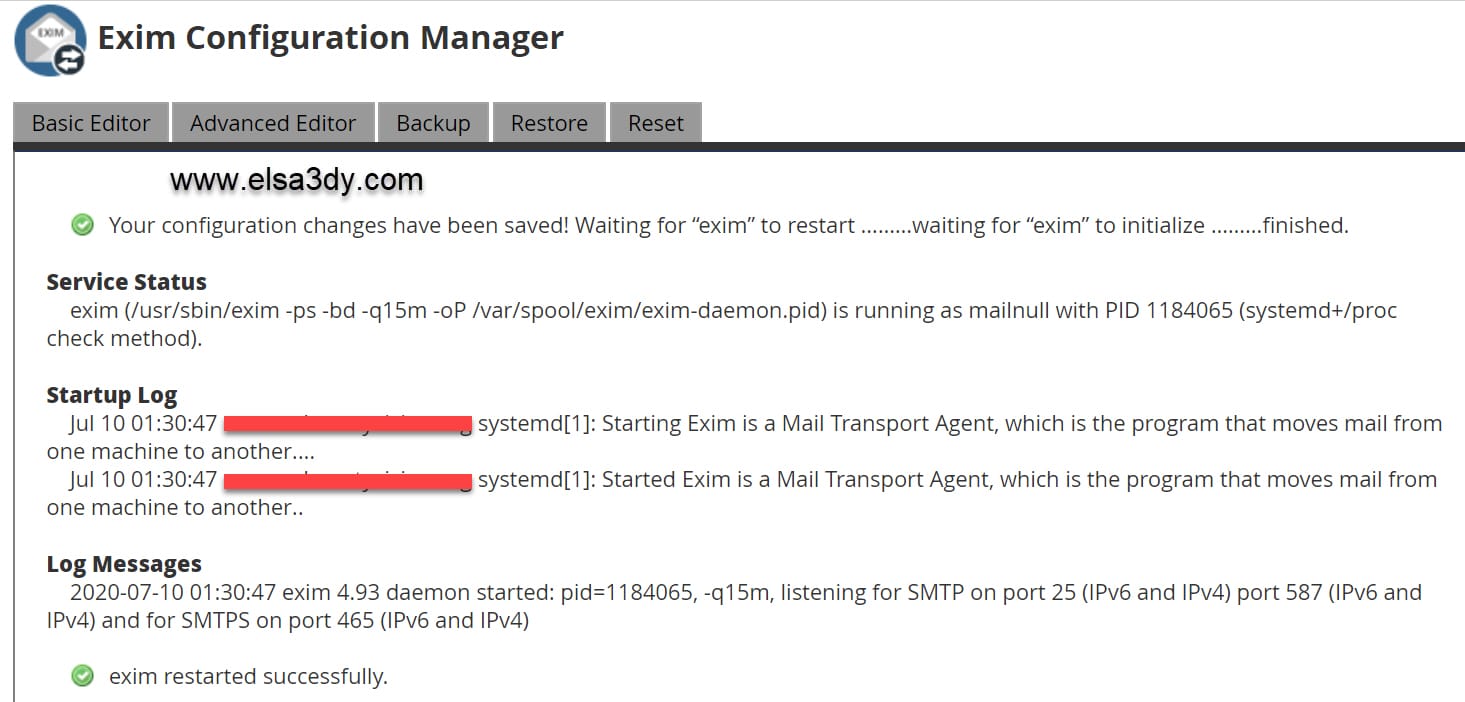
Now, scroll down and click on Save button, after doing that make sure you will see the following message with no errors:
Your configuration changes have been saved! Waiting for “exim” to restart ………waiting for “exim” to initialize ………finished.
Third Step, Creating Smarthosts file for SMTP settings.
Now we will create a smarthosts file that contains all parameters and SMTP credentials, you will need to log in to your server with ssh as root and execute the following command: nano /etc/exim_smarthosts_config
Copy and paste the following after change the reds text with your SMTP details and your domain name.
#sending by mandrill
yourdomaunname.com: domain=yourdomaunname.com user=mandrill_username pass=mandrill_password smtp=mandrill_smtp_host port=mandrill_port_number
#sending by sendgrid
yourdomaunname2.com: domain=yourdomaunname2.com user=sendgrid_username pass=sendgrid_password smtp=sendgrid_smtp_host port=sendgrid_port_number
For instance
#sending by mandrill
elsa3dy.com: domain=elsa3dy.com user=elsa3dy pass=ybEz1IRd smtp=smtp.mandrillapp.com port=587
Save /etc/exim_smarthosts_config, restart the Exim and test.
Notice: Every change you will made to a file exim_smarthosts_config requires a Exim restart to run your tests.
Here is an explanation of each point in this file:
domain: A domain name that you need to use to send emails via custom SMTP.
user: user name or ID that used to start a connection with the custom SMTP.
pass: Password or API secret, or API key etc. that used for the SMTP user.
smtp: the SMTP server address of smarthost.
port: the port that used in Smarthost (587, 586,25 or another).
If you faced any issues during the implementation, just leave your comments below and I will be happy to try to help you solve it. 🙂